
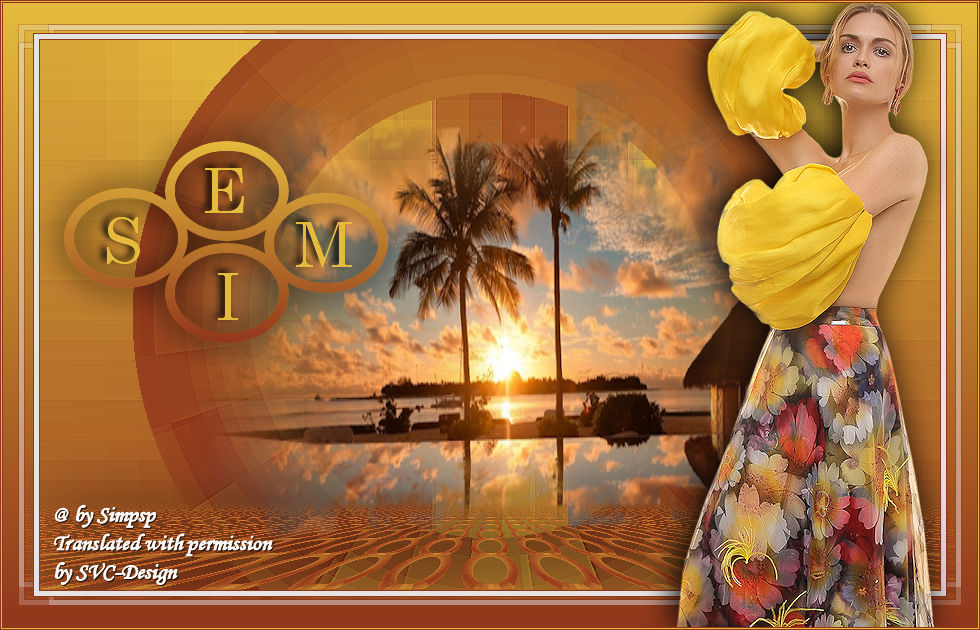
This lesson is made with PSPX9
But is good with other versions.
© by SvC-Design

Materialen Download :
Here
******************************************************************
Materials:
14alphachanel_esin.pspimage
050PaisagemByPqnaAlice.png
164MulherByPqnaAlice.png
******************************************************************
Plugin:
Plugins - Filters Unlimited 2.0 - Deformation - Alias Blur
Plugins - Filters Unlimited 2.0 - Deformation - Circulator
Plugins - Mura's Meister - Perspective Tiling
Plugins - Toadies - What Are you?
******************************************************************
color palette
:

******************************************************************
methode
When using other tubes and colors, the mixing mode and / or layer coverage may differ
******************************************************************
General Preparations:
First install your filters for your PSP!
Masks: Save to your mask folder in PSP, unless noted otherwise
Texture & Pattern: Save to your Texture Folder in PSP
Selections: Save to your folder Selections in PSP
Open your tubes in PSP
******************************************************************
We will start - Have fun!
Remember to save your work on a regular basis
******************************************************************
1.
Choose three colors to work with:
Foreground: #91361b
Background: #e5bb3d
Color 3: #e6e4e2
2.
Open 14alphachanel_esin.pspimage
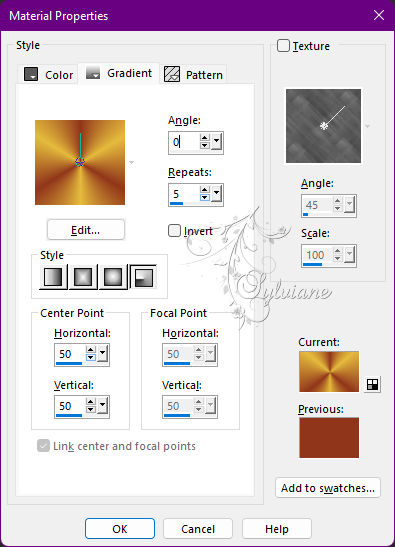
Paint transparency with a Radial gradient formed by foreground and background colors:
3.
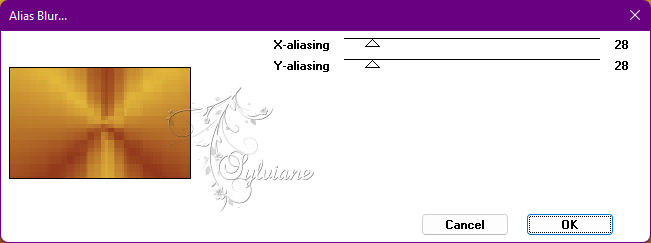
Plugins - Filters Unlimited 2.0 - Deformation - Alias Blur
4.
Effects - Edge Effects - Enhance.
Layers - Duplicate.
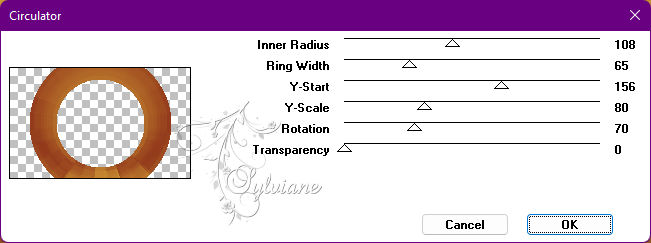
Plugins - Filters Unlimited 2.0 - Deformation - Circulator
5.
Layers - Duplicate.
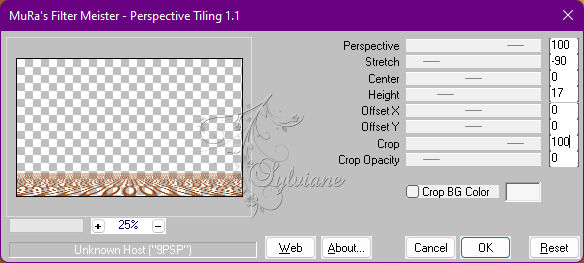
Plugins - Mura's Meister - Perspective Tiling
6.
Adjust - Shapness - Sharpen.
Ativar a ferramenta Magic Wand, tolerance 0, Feather 20.
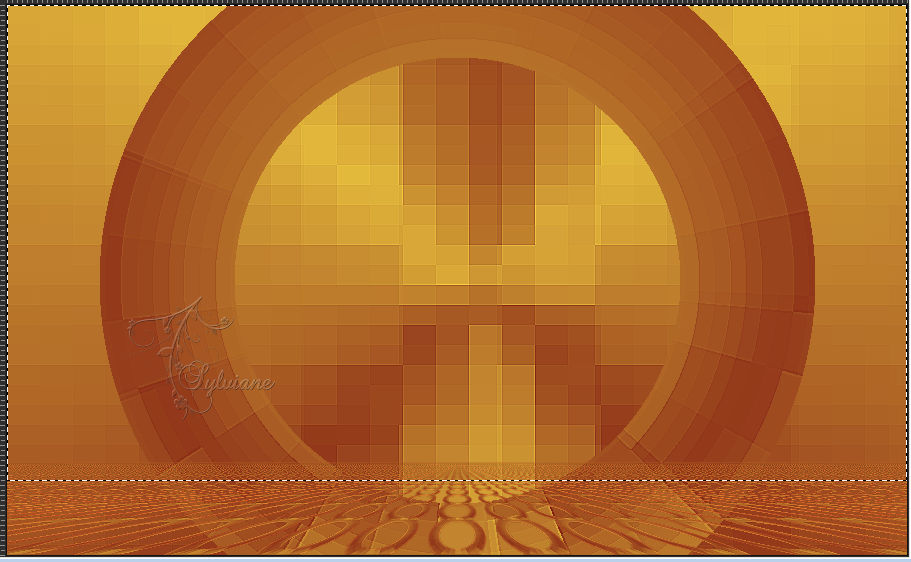
Select the top part of this effect and press the Delete key 5 times.
Selections - Select None.
Effects - 3D Effects - Drop Shadow: 0/0/100/100, Color: #000000
7.
Open 050PaisagemByPqnaAlice.png
Edit - Copy.
Edit - Paste a New Layer.
With the Pick Tool adjust the landscape to your choice
Adjust - Sharpness - Sharpen.
8.
Layers - New Raster Layer.
Selection – Load/Save Selection – Load Selection from Alpha Channel - Selection #1.
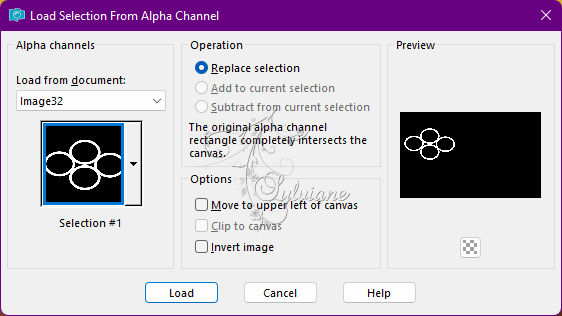
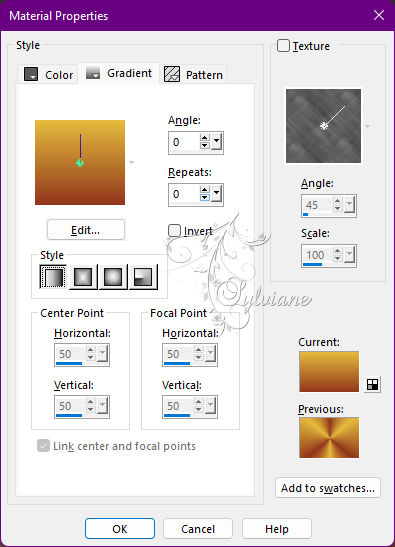
Paint with the Linear gradient, formed by the Foreground and Background colors:
Effects - 3D Effects - Drop Shadow:
0/0/100/50, Color: #000000
Selections - Select None.
9.
Layers - New Raster Layer.
Selection – Load/Save Selection – Load Selection from Alpha Channel - Selection #2.
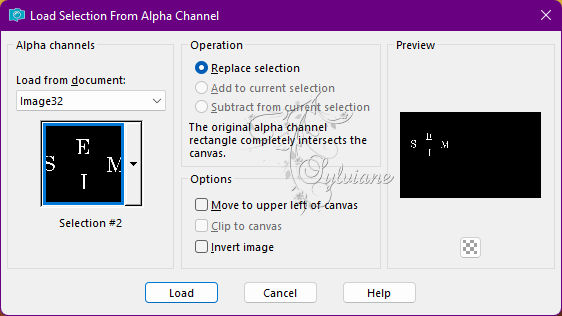
Paint with the background color.
Selections - Select None.
Effects - 3D Effects - Drop Shadow:
-3/-5/100/10, Color: #000000 (for that)
10.
Image – Add Borders –symmetric - 1px - Color: Foreground: #91361b
Image – Add Borders –symmetric -5px - Color: Cor 3: #e6e4e2
Image – Add Borders –symmetric -1px - Color: Foreground: #91361b
11.
Selections - Select All.
Image – Add Borders –symmetric - 30px any color
Selections - Invert.
Paint with the Linear gradient formed by the Foreground and Background colors:

12.
Plugins - Toadies - What Are you?
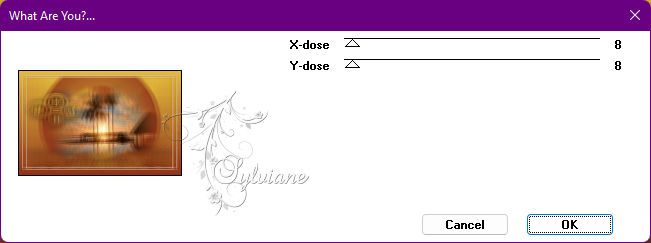
Selecctions - Select None.
13.
open The Main Tube.
Edit - Copy
Edit - Paste as New Layer.
Image - Resize if necessary.
Adjust - Sharpness - Sharpen.
Effects - 3D Effects - Drop Shadow of your choice.
14.
Image – Add Borders –symmetric - - 01px - Color: Foreground: #91361b
Image – Add Borders –symmetric - 01px - Color: Background: #e5bb3d
Image – Add Borders –symmetric - 01px - Color: Foreground: #91361b
15.
Apply your watermark or signature
Layer – merge – merge all (flatten)
Save as JPEG
Back
Copyright Translation 2022 by SvC-Design